My French Girl Dream

Monday, December 22, 2014

How photography can influence other art forms or artists

I recently attended the Picasso and the Camera art show at the Gagosian Gallery in Chelsea (522 West 21st Street). The art show was curated by John Richardson, who was Pablo Picasso’s autobiographer, curator and close friend. The exhibition explores how Pablo Picasso used photography not only as a source of inspiration but a big part of his studio practice. The exhibit includes photographs taken by Picasso himself that have never been seen before or published. There is also a wonderful array of drawings, paintings, sculptures, prints and films that provide a unique perspective on his relationship to the camera. While Picasso was widely photographed and had many photographer friends, he used the camera to try out new ideas. Pablo Picasso has been quoted by photographer Brassai, “I want to leave as complete a record as possible for posterity.”

There are many areas to love about this art exhibit. How the curators put the various works of art together in the whole space, the groupings of different art forms, the energy of the show and personal photographs layout in photo album form, photo frames or enlarged single pieces. The viewer gets a unique taste of what Picasso was trying to work through or pin point with certain art pieces. His relationships with his children, lovers, friends and students are lovingly displayed to portray Picasso as more human than super artist. To me, what makes a artist create and produce is always a mystery. We, as artists, are influenced by so many different things. How does your family and friends fit into your creative life? Can I work in another art form to bring those aspects back into my photography? I was energized that Picasso had the same questions that I had. The exhibition is a celebration of the man, his love of creating and the pieces he created with his talent and love of art. I would see this show before it leaves the Gagosian Gallery on January 4th, 2015.


PABLO PICASSO © David Douglas Duncan, Harry Ransom Humanities Research Center, The University of Austin

Tuesday, December 2, 2014

5 Tips for Holiday Group and Family Photography

1.Use a light modifier that is flattering to your subject. Skin tones need softer lighting for better portraits. Harsh lighting will give you sharp shadows under the eyes and nose or make the skin look unflattering.

2.Use a lower ISO. SKin tones are better reproduced with a lower ISO number. The higher the ISO, the higher the noise and pixels,which can make skin tones look spotty or grainy.

3.Have patience. Groups of families may take some maneuvering to get into place or have their attention looking towards you. Breath, be firm in your direction and showing patience will go along way with your clients and your portraits.

4.Smile. Clients want to have a good experience with you, in addition to a fabulous family portrait they will cherise. Pouty or grim faces can result in sad subject faces. You set the tone for your photo shoot. Bring your happy face and your subjects will bring theirs.

5.Shoot and shoot more. Groups of people are multiple eyes blinking or lips moving at the same time. Take a few of images of one set-up to make sure you have that one image in that set-up. The next set-up, do the same. Making sure you have more than one choice in each set-up will save you major headaches with your client.


Friday, November 7, 2014

Keys to your Successful Boudoir Photography Shoot

1.You must want to make your subject or client beautiful! Women come in all shapes and sizes and you have to treat them equally. I have been photographing women for a long time. We all have our insecurities-even skinny women! It is your job to bring out those special qualities in your subject, in addition to their sexy side. Think how you would want to be portrayed or even photographed in lingerie!

2.Make your photography skills a priority. Your photography skills, in terms of the right lighting equipment, camera lens and post production practices. How to pose your subject. Know what type of light source, reflectors or modifiers and camera lens works the best for boudoir images. Soft boxes, window lighting, shooting through a variety of modifiers-even white curtains can make a difference in a successful set of images. Try window light as a back light-it is so gorgeous. Use side shadows to slim your client’s figure. You do not want a camera lens that is so wide it makes your subject look like they grew in width during your shoot. Know what lens works best for small spaces and head to toe shots you may need. Practice posing friends or family if not comfortable with directing and posing. You client will be looking to you and listening to you for not just posing guidance but confidence building.


3.Hire the best makeup and hair stylist possible. Your team is such a big reflection on you and your boudoir business. You want a creative team that is professional and can do good work. You can always do a test shoot with new talent, if you are not sure or want to see how you work together. Your subject is not only looking for a great photographer but a professional makeup artist that can make her up in a way she may not do everyday. A great makeup and hair stylist will save you a ton of time in post production as well. I work with a group of talent that is so good I hardly have to do any retouching on the make-up or hair styles. But I have had some talent that were lazy or inexperienced. I had to spend much more time in post production fixing their mistakes.

4.Directing and posing. You are your client’s cheerleader with boudoir photography. Your tone of voice, the words you choose and how relaxed you are make a BIG difference with photographing women in their lingerie. Have music on that makes them feel sexy. Use words that your client can understand when directing. Show them what you mean-get on the floor-push your hip out-whatever it takes to get the pose you need to make that fabulous photograph.Your client may have personal space boundaries-remember to talk to them if you have to come in close and move hair or a bra strap. Talk to your client while shooting-”I’m shooting from the waist up or from the tush to the toes. Know your camera angles. Try to shoot different sides of your client or pay attention to their wishes. I have had a few clients who prefer their right or left side or no nudity.


5.Keep your client/subject engaged and have fun! Your client may not be familiar with photo shoots, strobe lighting and posing, let alone being semi nude in front of stanger. It is takes a lot of energy to be a model! Keep your subject engaged, especially in the eyes. The eyes say everything. Ask questions about your subject or choose a topic that interests them. Tell them they are doing great while shooting. Be their cheerleader. Laugh. Smile. Be genuine. Make sure they are hydrated. Take breaks, if need be. Give good advice when it comes to lingerie and props. Some of my new boudoir clients were ready to go home after a half hour! While others wanted to shoot for hours. Show them a few images every now and then. and be sure to thank them after the shoot!

All images (c)Lisa Ramsay Photography 2014

Friday, October 24, 2014

Street Photography-Try these  


1. Ditch the zoom lens and use a wide angle prime lens. They are less obvious or threatening in public and can capture your subjects without necessarily pointing your camera directly at them. 


2. Get Close. By getting close to your subject, this perspective will give your viewer will feel they are part of the image instead of just a voyeur looking in.

3. Always carry your camera with you. Now with cellphone cameras being very good, you may say "I have my cellphone" on you. Large file size for retouching is key. Yes, you can retouch a cellphone image but I find it's easier with the largest file I can capture.

4. Look for Juxtaposition. Look for signs with interesting messages, individuals that difer in height, complexion or even weight. You want to convey the humor, irony and beauty of everyday life by juxtaposing people with others or environment. and yes, that is me in between Santa Claus and Mickey Mouse.


5.Just do it and tell that story. Whether it is with one image or many, you have to go out on the street with your camera and just start shooting to tell that story with street photography. Ask yourself what your inspiration will be that day and start from there. Or you may see what unfolds while walking around. You have to be on the street to start the process.


All images are (c) Lisa Ramsay Photography. 2019

Monday, October 13, 2014

Daylight and Available Light-Part Two

Daylight and Available Light-Part Two

In my last blog post regarding daylight and available light, I mentioned the quality of light and the direction of daylight. You need to recognize these two very important elements with outdoor and some indoor photo shoots. Here are some daylight lighting situations:

Side Light. Early in the day or late in the afternoon, this type of light is really beautiful. It can be the first choice for landscape, cityscape's or wide scenic views. For buildings, side light at different times of the day and year can be very important in the quality of light and how it reflects off the building. Sidelight can be a gorgeous portrait light which can showcase facial planes and lines.

Back Light. Generally, very low morning or evening sunlight is most effective. Coming from behind a person, scene, tree or building, this light can be blinding to the photographer. When used correctly, this can be the most interesting light. Long shadows come towards you, the head will be haloed with sunshine. Leaves and flowers will be translucent. This type of light takes some practice to get your subject perfectly exposed while having the back light effect present. Light flare caused by the sun's  direct rays hitting the lens and bouncing around can cause small blips on the image. Ywww.lisaramsayphotography.comou can always use your camera's preview button to see if you are getting these blips or any other lens flare. Sometimes flare can add excitement to a photograph. You have to move around your subject, to try and capture the light flare or halo effects. I had an engagement photo shoot on the Brooklyn Bridge. They were not very enthusiastic about photographs with light flare behind their heads. When they viewed the images, those back lite images were some of their favorites from the photo shoot.

Flat Light. Very low sunlight from behind you that hits your subject directly in front of you is flat light. This type of light is typically warm and yellow. You can use this light early in the evening in most of the country. when using a telephoto lens, flat light can be dramatic for landscapes, water scenes and storm clouds that are forming. It is dramatic light for city scenes, traffic, markets and other textural scenes. When light is flat, you can under expose scenic views for deep blue skies.

Soft Light. Low light before sunrise and after sunset at dusk, diffused clouds or misty weather conditions, soft light is wonderful light for portraits, people studies, landscapes and mood photographs. Soft light may require a tripod for the lower light quality.

Top Light. This type of light comes from overhead. It is usually strongest during the summer months or in warmer regions of the globe. It is generally the rule of thumb to avoid this type of light. Deep shadows under people's nose, eyes, mouth and chin make unflattering portraits. The division between shadows and light areas of a scene can be very drastic. I would recommend a fill flash or a reflector for portraits. I would try to avoid photographing with this type of light but if you have to, be prepared
with your flash or move your subject to another area with softer light or shadows.

Contrasty Light. This is when a scene is brightly lite with deep shadows. Street scenes with half the street in shadow and half in light is very hard to expose correctly. If you expose for the shadows, your bright areas of the scene will be very under exposed. You will have to decide to avoid photographing at times and places where the light is broken up in this lighting extreme.  You can always come back at another time of day or night or angle to capture the scene correctly.

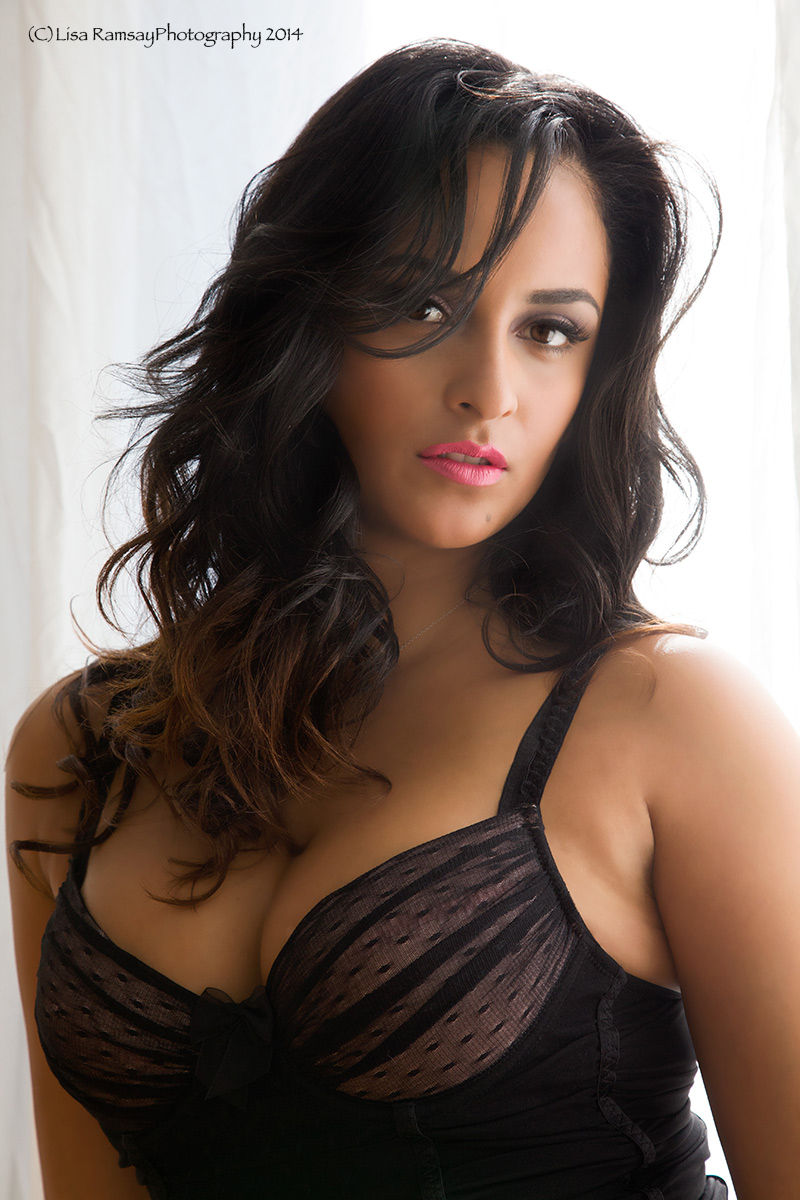
Window Light Indoors. This is very beautiful light for portraits. You can diffuse the light with a curtain or if it's lightly cloudy, the light will be especially beautiful. A tripod may be needed or a fill flash. Interiors will need to be on tripod for longer exposures or lower camera settings.

Available Light. This is light that is available to you where ever you are. Lamps, over head lights,
car lights, electronic signs and many other types of light sources can be really fun to use for your main light source. You will have to be observant to the color of your light source. You can change the color of your light with your camera lighting setting or by the color temperature setting. With digital cameras today, you may not need a tripod. If you want to use a low ISO setting, a tripod would be necessary.

Friday, October 3, 2014

Daylight and Available Light

While out walking around Manhattan today, I looked up at the sky to "look" at the light quality. The sky was a beautiful shade of blue and the shadows on the buildings were faint. It got me to think about daylight and available light. I'm going to talk about these things n two blogs.

Learn to see light. Most people take photos outdoors with out giving thought about the quality of light. The most oridinary thing can be brillant in the right light. To master both daylight and available light, start looking at light and thinking about it.

Daylight is not the same at different times, different seasons, different weather or different places. Even you can not travel, if you choose to shoot at a variety of times throughout the year, you will have a variety of light quality. It's up to you as a photographer to use this free resource to your best advantage or know how to make it work for you if you can't choose the time of day to shoot.

One of the most important things I can suggest is choose the time of day to photograph. It can make all the difference between an average shot and a fabulous one. Many professionals such architectural photographers or travel photographers, spend a lot of time waiting for the light to be just right. Landscapes can be best photographed early morning or early evening in some locations. While on location in the Bahamas and the Florida Keys, I had to get up before dawn to capture landscape and lifestyle images before the strong summer sun came out to over exposure the entire area.

Weather is important too. On soft lit cloudy days, the light is often flattering to people. Outdoor portraits shot in this light do not have hard shadows on the face that you might get in bright sunlight. You can shoot in the rain, fog or snow (be sure to protect your camera) and produce stunning images with the weather acting as a softing light modifier. Blue dusk is a great time to shoot mountains. Dusk views in big cities with millions of lights on is wonderful light to shoot buildings. and living in a big metropolitan area, shooting at dusk with a tripod is very easy to do.

The quality and direction of daylight is very important. Once you learn to recognize and use it, you'll have better photographs. that is where I am going to leave off. Take a look at the sky, the sides of buildings and a different times of the day.

Monday, September 22, 2014

Stun Me! some of my experiences as a photographer at photo shoots

“Stun Me” How to avoid unfashionably bad communication on photo shoots.

Mishaps, miscommunications and human error can happen on any photo shoot. I want to share my experiences so they can be avoided on your future photo or video shoot.

Keep it clear as Crystal:

Always make sure your creative team understands your directions-to the “T.” I had a hair stylist take over a bathroom, in a hotel room, for over an hour creating a hair look I did not ask for. When the model emerged with super kinky huge hair, I did not know what to say or do. Time was not on my side. After taking the hair stylist aside and explaining the hair was not what I wanted and did not want for the second model, I started to shoot. My make-up artist and I pulled the model’s super kinky frizzy hair back and created a new look. I later changed the hair in photoshop.

Keep your tone Pitch Perfect:

Use a tone of voice that is strong and calm. I had a celebrity fashion shoot. The celebrity was attended by her mother and publicist. While shooting the celebrity, tethered to my laptop, my assistant caught my eye. He made a gesture to look at the laptop, which was behind me. The publicist was taking photos with her camera as they were coming up on the laptop. I gently put my camera down and addressed the publicist.

Me: “What are you doing? You can not be doing that while I am shooting.”
Publicist: ”I just want to make sure I have something as a reference. I won’t use them”.
Me: ”If you keep photographing my images on the laptop, I will stop the photo shoot”.  

The publicist stopped taking photos and the photo shoot continued.

Keep a level head and consistent vision:

Sometimes you need to call the model booker. I had an outdoor fashion shoot last summer in my local park. I had included in my reference photos and photoshoot description to the whole creative team and modeling agency that we would be shooting bathing suits. The model we booked was very opinionated and offended everyone on the team except for me and the make-up artist. The creative team was not happy and felt like their work was not appreciated. When it came time to photograph the bathing suits, the model refused. She told us she talked it over with the booker the day before and didn’t have to wear them. While the model was getting her make-up changed, I went to a quiet place and called the booker. I explained what was happening and that the bathing suits were not only essential to the editorial but agreed upon prior to shoot. Booker agreed and said to give him 15 minutes to call model. I pulled the model aside and had the only conversation I ever had with a model that her behavior and attitude stank. And that I called her booker who was not happy with her either. Model spoke with booker. The bathing suits were photographed and became opening page to editorial.

Support your team fairly and firmly:

How to avoid your make-up artist from going crazy. I had a location fashion shoot with two models. One model did not like the make-up that was done for the editorial. The model wiped off the lip and eye color and reapplied the make-up to her liking with her own make-up. While shooting the other model, the make-up artist pulled me aside, told me what happened and threatened to quit the shoot. I finished shooting the other model. After calming down the make-up artist, I found the other model in another area. With the make-up artist at my side, I explained to the model that the make-up artist was in charge of the make-up and she would have to sit through another round of make-up changes that I wanted. Model agreed and we finished shooting.

Do your leg work and know what to expect:

Do your homework before a photo shoot or workshop. I recently taught a photography workshop for Manhattanhenge, where the sun descends in alignment with certain streets in Manhattan. My workshop was in Long Island City park. I followed the directions given to me from the school founder, but did not do my own research as to where exactly we should be standing in this park. I get the students together, set them up and give a lecture. As we are waiting for the sunset, a few students asked if we were in the right spot. I assured them we were. After some research, one of the students realized we were in the wrong place! With little time to spare, I moved the students, their cameras and tripods to the correct location. One of the students had some stern words that I should have know where to go from the start, since they paid for the workshop. I apologized and said I would do my homework next time.

Tuesday, January 14, 2014

Catch light, by definition is:a light source that causes a specular highlight in a subject's eye in an image. They are also referred to as eye lights or Obies, the latter a reference to Merle Oberon, who was frequently lit using this technique. A catch light may be an artifact of the lighting method, or have been purposely engineered to add a glint or "spark" to a subject's eye during photography. This technique is useful in both still and motion picture photography. Adding a catch light can help draw attention to the subject's eyes, which may otherwise get lost among other elements in the scene.
A catch light is not the same as the red-eye effect; in general, red-eye is an undesired effect (caused by the reflection of light from the retina inside the back of the eyeball), while catch lights are often aesthetically desirable, and produced by light reflecting from the cornea. Especially in portraiture, eyes without catch lights are often said to appear dull or lifeless. Lighting is often arranged in studio portraits specifically to create attractive catch lights.
As a specific light source, a catch light is usually fairly dim or focused, as to not affect any other part of the scene or face. Many other lighting methods, however, are known for the distinctive or unique catch light they produce. Among those methods are ring lights, which produce several highlights in a ring, and large softboxes, which produce large, square highlights. While catchlights most often appear to be simply bright spots, as reflections of their surroundings they can contain entire images.
First, you should:

1. Find your light source.

In any photo shoot…whether professional, hobbyist,
Where is your light coming from?  Look around.  
Are you outside?  Are you in open shade?  Are you inside?  Where is your light coming from?  
Open shade:
Light source: sun, filtered by the shade of the walkway.

Open Sky:

Light source: sun, filtered by the distance of the sun in the evening light.

Window or door:

Light source:Photo taken inside, facing the window.

Flash:Taken in a photo studio, indoor or outdoor space.
Light source: electronic or continuance artificial lights

If shooting without artificial lights, turn your subject to face your light source. Look into their eyes to see where the catch light is reflecting in your subject’s eyes. Move or tilt the subjects face or body to where you feel the catchlights have the look you want.
With artificial light source, how high and how far to the right or left will affect the catchlights in your subjects eyes. I find that having the light source at a 45 degree angle, pointing down towards the subjects forehead creates a nice catchlight. It take practice and talking to your subject as to where the catchlight should and will fall.