My French Girl Dream

Friday, December 11, 2015

A Creative Portfolio

Your portfolio is your calling card to the world. There are many options to create an exciting body of work.  What do you include or how you layout your images can make a big difference in your portfolio’s impact to your viewer. I make small prints of my portfolio pieces and lay them out on the floor or table. I move them around to see how the images flow from start to finish. You can do this on your computer as well. You want to create excitement, a continuous flow of interest and strength within each body of work. Your portfolio can include more than one subject matter. However, it is very important to keep those subjects together.  Find images of various subject matters that can speak to each other when placed next to each other to lead the audience from subject to subject.


Editing is key to a strong portfolio. We are sometimes too close to our work. Have another set of eyes review your choices before publishing or doing final prints. I have my sister and a few friends look over my portfolios. Their critiques help me decide if I need to retool a portfolio or move forward. Decide if you want a vertical or landscape portfolio. Merging the two formats can be done, in one portfolio. Your layout has to be flattering and be consistent throughout the whole portfolio. Spacing around the images, at the border of the page or no border are important decisions that can make or break your portfolio’s impact. View other portfolio’s to get a sense of layout options, if you are not sure which way to go. Your portfolio will change over time, just like your photography work. You want to present your best images, at all times.


Tuesday, May 19, 2015

Sunset Photography - It's that time of the year to start shooting more of this. Here are some suggestions:

Sunset photography is a favourite subject any time of the year. The rich colours, dramatic lighting and strong shapes they offer can produce stunning shots. Your focal length setting and choice of viewpoint will make a big difference to the picture. A quickly grabbed wide-angle shot might capture the broadest area of sky but won’t necessarily give you the best composition. A longer focal length and a more carefully chosen viewpoint can produce a much more effective result. The sun will be bigger in the frame and you’ll have more control over the shapes and silhouettes appearing in your sunset photography. But what to do if you do not have your longer length lens with you? You change your positioning, composition or angle to shoot. I love moving around, shooting from a different height perspective. Your ISO is hugely important and will change if you have a tripod. I like to use a low ISO with a tripod at sunset or sunrise. Tilting your camera can give you a new perspective with your sunset subject.

Making the colours in your landscapes warmer can be a simple matter of changing the white balance on your camera from Daylight to Cloudy or Shade. The sky can act as a giant reflector so be careful when setting your white balance. Use centre weight metering for those important sunset images. It is more influenced by large open areas of sky. And by all means wear comfortable shoes! You will be standing or moving about for awhile capturing the sun orbit the earth.


Image (c) of Lisa Ramsayphotography.com All Rights Reserved.

Monday, April 6, 2015

Urban Fashion Photography


Street-style photography became popular in the 70s, pioneered by New York Times photographer Bill Cunningham, but it wasn’t until the mid nighties that it really gained recognition. Since then, its explosion has been fairly swift, with hugely influential blogs such as The Sartorialist launching in 2005 and photographers such as Yvan Rodic, Tommy Ton and Philip Oh being commissioned to photograph street style for the glossies, ie magazines.

I met Bill Cunningham while I was employed at Women’s Wear Daily in the 1990’s. He really set the tone as to capturing with his camera what women were wearing on an everyday basis in the urban jungle of Manhattan. Women’s Wear Daily followed suit with their column,  “What They Are Wearing”, photographing not only people on the street of New York City but across the United States at music festivals, fashion shows abroad and around the world. Mr. Cunningham always said let the clothes speak for themselves, including the shoes and never be rude to your subject. Great advice for a rookie urban fashion photographer.

For a long time, editorial photography and street-style photography happily co-existed. Street style used to be about documenting real fashion – it was meant to be alternative to magazine fashion. But then it started to require shooting the kinds of people the readers of fashion publications were interested in, and that turned out to be more the insiders than everyday people. You have to make sure the clothes do not get lost with your background. Too many lines, graphics or colors can swallow your model, outfit and editorial. Motion is a fun aspect to urban fashion photography. Having your model move adds an added layer and feel to the shoot. Use an unexpected location for your images. I love playing with contrasts. I photographed swimwear in an empty bodega and used one of the windows to showcase a particular bathing suit and pose. Use available light to add to your images. Grainy photography for urban fashion is really awesome. It puts an edgy element to your work. I often use overhead lights for outdoor urban fashion at twilight to add mood to my story. People on the street can be your inspiration for a urban fashion spread. We live in one of the most colorful places in the world where fashion is taken seriously by some. Take a look around you and notice what your fellow New Yorkers or tourists walk around in. It may surprise you.


(C)Lisa Ramsay 2015

Tuesday, March 17, 2015

One of the hardest things beginner photographers do is not to place the subject of their work dead center in most of their images. Playing with the space of your image frame can create more riveting and exciting images. While photographing on the Brooklyn Bridge, I came across a young couple taking their own photos of each other on the bridge. I thought it would be a fun photograph to include them in my image.  I moved around a bit and decided to play with my spacing. I positioned the couple off center to lead the viewer’s eyes in from the left and to include the majestic bridge. The result is energetic and different point of view photograph. Had I photographed the couple dead center, the couple might have been overpowered by the bridge.
Off-Center-Your-Subjects.png
While looking through your viewfinder, move around. Take your subjects off center to create visually pleasing images that tell a different story. Play with spacing on top or bottom or on the side of your image. You will produce eye catching images that are unique.
 

Thursday, February 5, 2015

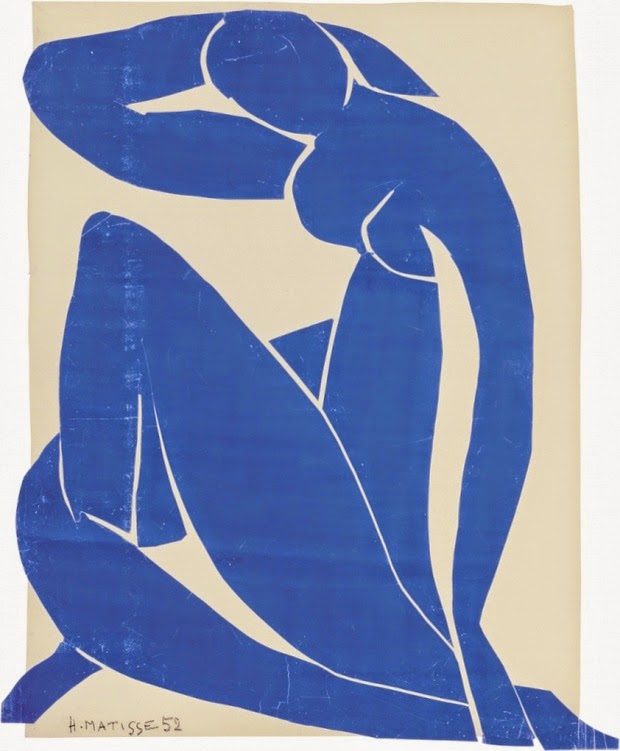
Henri Matisse Cut-Out’s Exhibit-Inspiration in Color

I had the chance to view the highly popular Matisse Cut-Out’s art exhibit at the Museum of Modern Art. With shows of this magnitude, I tend to move around a lot to avoid large groups of people and their conversations. Or do not take the time to read the information provided by the museum to give some background or material information on a certain section or piece.This art exhibit grabbed my attention as soon as I walked through the doors.

Small to mid size pieces of a wide, intense color variety showcased Henri Matisse’s love of color, shape and storytelling. Subject matters had multiple pieces to evolve that idea or scene Matisse was creating from. Whether if it was the Moroccan fabric, view from his window or seashells, these pieces laid the groundwork for the large ones that were created. Larger pieces of women dancing, a swimming pool’s light dancing in the waves, church iconography or the bottom of the sea, these majestic works or art treated your eyes to vision of multiple colors and shapes, Your intellect and physical senses were also touched by their sheer size and composition of placed cut-outs on burlap or white paper.

Videos shown gave you a small glimpse of Matisse working with the cut-out pieces, directing his assistant to place them just so. The viewer also gets a behind the scenes experience from another video that shows the laborious restoration of “The Swimming Pool” piece.


You also got to see the different shades of color painted on each piece of paper before they were cut-out, in addition to the variety of stain glass colors used in the church cut-out pieces Matisse created. Composition, abstraction, color & it’s flavorful depth and strong storytelling are just a few of the aspects of this art exhibit that made it so successful for me. I would see this show and maybe see it again before it closes in February. Fantastic display of imagination and delicious color.


Wednesday, January 28, 2015

Lean in and create some fun images.

Sometimes to change my image composition, I lean into my subjects. I can change the mood, direction of photo shoot and connect to my subject using this technique. I feel more part of the shoot with this style of shooting. It also opens the door for conversation or laughs with your subject. You composition can be more two dimensional and lively with this shooting style. Before doing this, I would make sure you have a lens that will work while getting in close. I would photograph this way if I felt the subject was game or in good spirits. A subject that has strong personal space boundaries or feels really uncomfortable in front of your camera may not be the best subject to try this with. I try not to make my subject feel more stiff.  The participants of the Color Run I photographer were very game with me leaning in and photographing them close-up. They even played along, creating funny faces or shapes with their bodies.

Thursday, January 15, 2015

Let’s shoot in Manual Settings and Manual Exposure.

What scares a new photographer more than the sticker price of a decent DSLR camera? Shooting in manual settings and manual exposure. Once you understand what key factors are involved and practice a lot, shooting in manual will come naturally. Your exposure is the amount of light (controlled by the aperture or f-stop of your camera lens) that is captured over a specific amount of time (controlled by the shutter speed of your camera shutter). Your ISO controls how much noise or grain is recorded on your images. ISO also influences your aperture and shutter speed choices. I often tell my beginner students to put your camera setting on Program. Position your camera to what you want to photograph. Depress the shutter and see what the camera is going to record your scene or take an image(check image info for camera exposure setting). For the next image, you change the camera setting to manual. Change your shutter speed and/or aperture to see what happens to your next image.
Keep moving the dials up and down so you change the exposure and see what your choices are capable of.

Understanding your camera’s metering system and the quality of light you are shooting in also helps with selecting your manual settings for the correct manual exposure. In addition to white balance, exposure compensation and steadiness of your hands, your manual exposure is unique combination of numbers, science and creativity.